You know how it is, you see all the gorgeous decor in the stores and you just have to start decorating. Since we moved in the week before Christmas last year, I didn’t have much Christmas decor up. In fact, we barely had the furniture in the living room arranged, boxes cleared out and a really tiny 4′ tree up. I was happy to call that good since that was about all I could get done. I did manage to have 18 family and friends over Christmas night, so that made me a happy girl. I just did a cold cuts tray, with all kinds of breads, fruit, cookies, pies and all kinds of finger foods. Everyone seemed to be happy. Now that we will have been here a year, I can’t wait to start my decor. Our living room has 2 story vaulted ceilings, so we bought a 9′ tree. Now to get that up, I need to get out the step ladder and I also need a ton more ornaments.
We have stairs for the first time in over 20 years, so I can’t wait to hang a garland and decorate. It has been so long that I needed to figure out the best way to do this especially since we don’t have a banister railing to tie the garland too. I thought I would give you a step by step of how we put ours up in case you are adding garland to a flat wall area too.
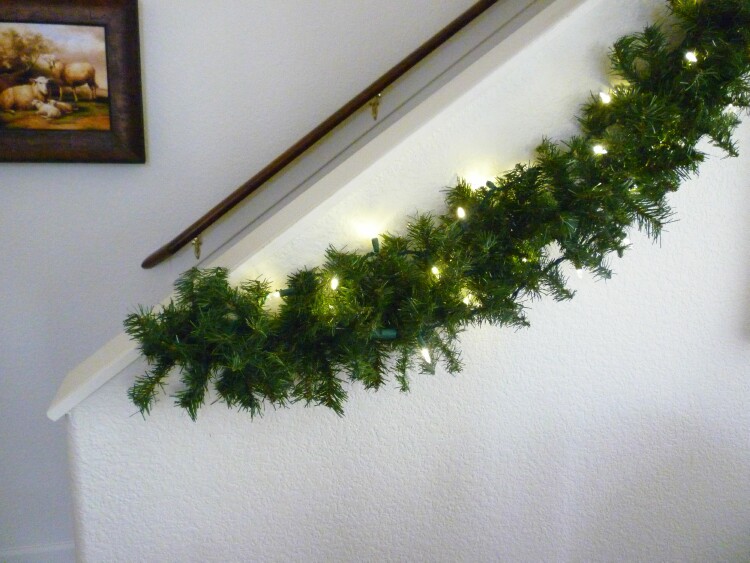
We started by twisting two inexpensive strings of garland together and attached them to the stairs with some pipe cleaners tied onto hooks. We just did a soft drape and then I played with shaping each little branch. I had 27′ of garland to fluff, (that took a while) now it is up to hubby to do the lights and I can decorate them with lots of pretty balls and picks.
We doubled up a string of lights, and hubby wove them in and around each garland.
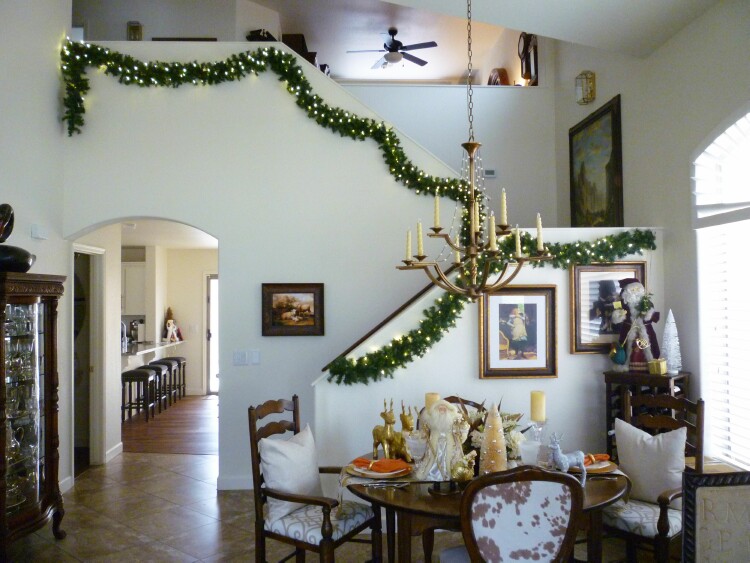
So far looking good. I think we need to do the top railing too, but this is looking good so far and will be so pretty when it is decorated. Can you see all the mess on the table. I need to get that cleaned up for sure.
Ok, on to the rest of the garland. This all looks so uniform that I think it needs a few springs of greenery every now and then to make it appear more natural. I found a spray of greenery and cut it all apart, so I can add a little here and there.

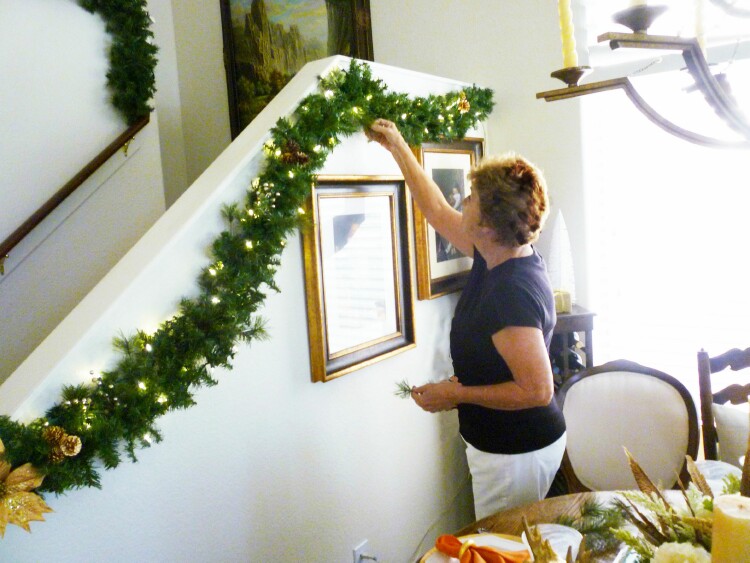
Hubby grabbed the camera and caught me off guard as I was adding a few picks of pine cones.

He also caught me in the act of adding the green sprigs. About this time I took the camera away from him. (Sorry the pic is so blurry. I didn’t see him taking pictures so I was moving all over the place. Not sure why my hair looks red, it really isn’t.)
Adding the green sprigs, berries and a few other picks gave it some dimension and made it look more free form and natural.

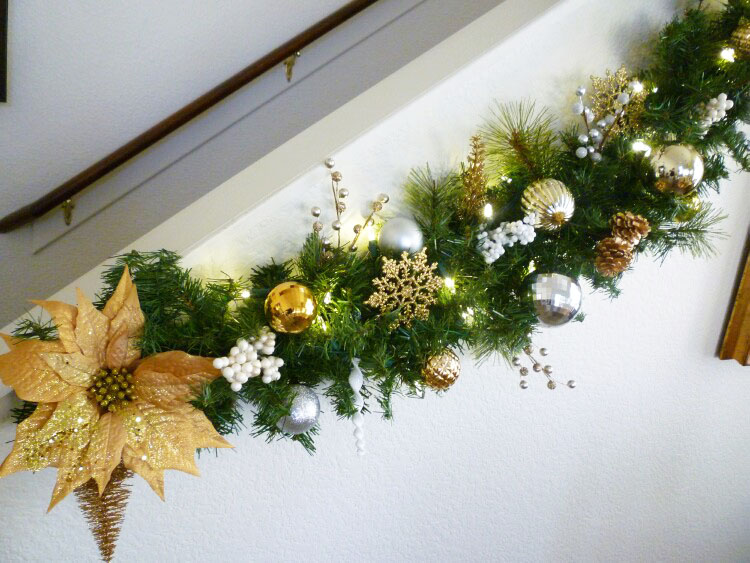
Doesn’t it look better with the green sprigs and all the picks, it upped the game a ton. I just used an assortment of picks, so use what ever you have or like.
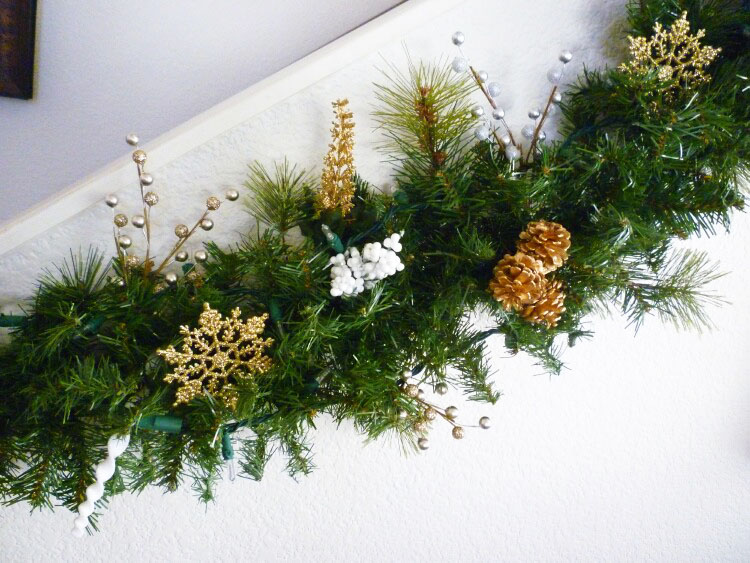
With a few silver and gold balls of all kinds and it looks fabulous. Everything I read said knowing when to stop is key, so I am stopping.
Now I am busy doing the top of the stairs. I have to lean over the railing and do all this upside down, not an easy task. Can’t wait to show you how fabulous it looks.
Don’t forget – Mark your calendars for our 2017 Christmas Home Tours.

If you like Thrifty & Chic on a Budget, I would love to have you follow me.
Have every post delivered to your inbox with Bloglovin
Check out Pinterest & See behind the scenes on Instagram


