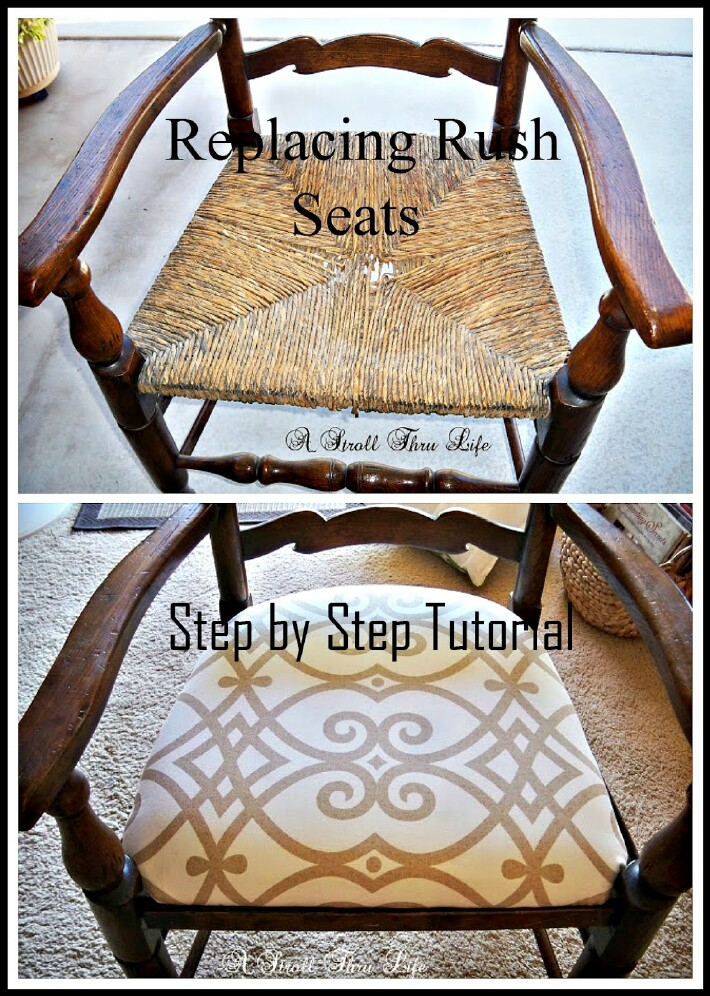
Have the rush seats in your chairs started to fall apart? Replacing Rush Seats – Step-by-Step Tutorial – Updated and Revised. This is a post I did a few years back but it is one that is pinned several hundred times a day. So I thought it was time to post it again in case you missed it.

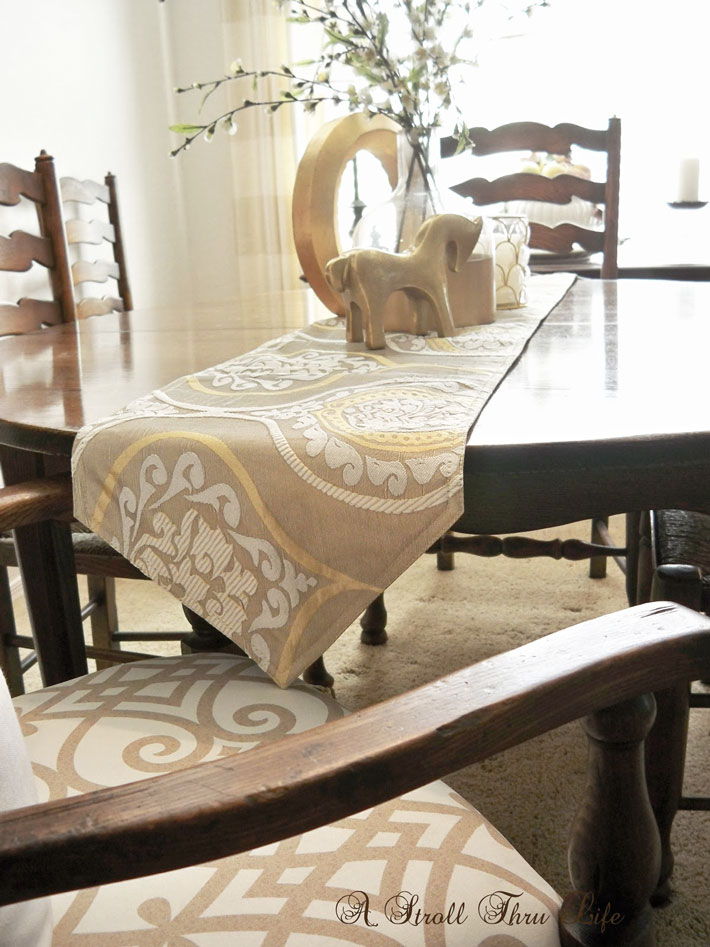
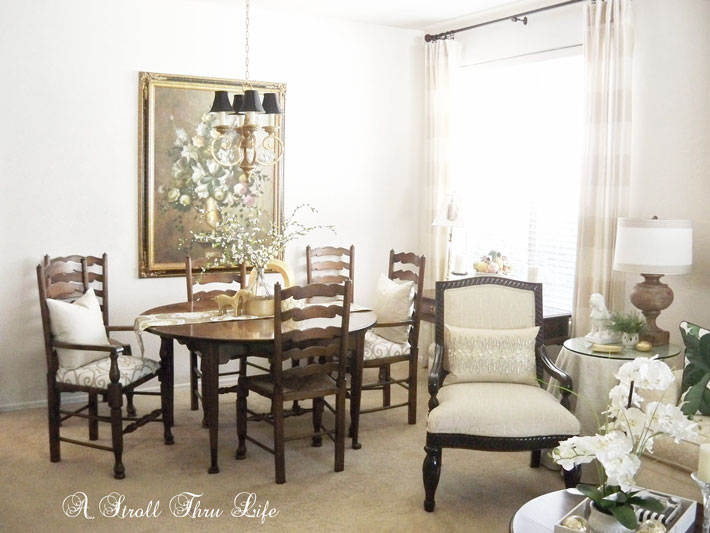
I love my dining set, a gorgeous table with 6 chairs and 4 leaves so it can extend to seat 12. This was my first really nice piece of furniture, and it is still a favorite. Years back I had the opportunity to buy a few things from the LA Furniture Mart through a designer friend that I met. She took me to a showroom that specialized in European imports. I saw this table and chairs and just fell in love.


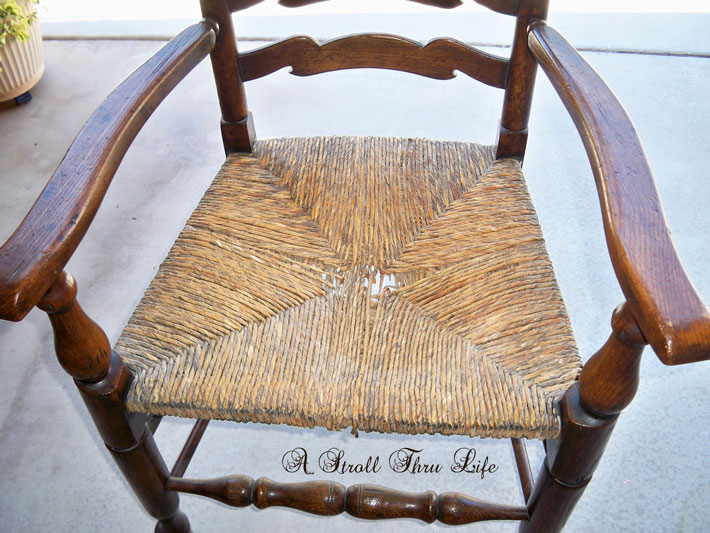
Without any leaves, it is 54 inches round and comes with 4 side chairs and 2 captain’s chairs. The leaves have full aprons too, so it is glorious even when you use all of them. The ladder back design is so pretty and so are the spindles and the spoon feet on the legs. This is my problem, after years of enjoying them the rush seats have deteriorated. I have looked for someone in the area to replace them, but only found 1 person that said she might do it and that it would be approx. $125 to $150 a chair and it would take her a while to get to me. The side chairs are all still in perfect condition, so I have been on a mission to figure out how to save the captain’s chairs and not have to pay that huge price and to be able to use them now, not someday.


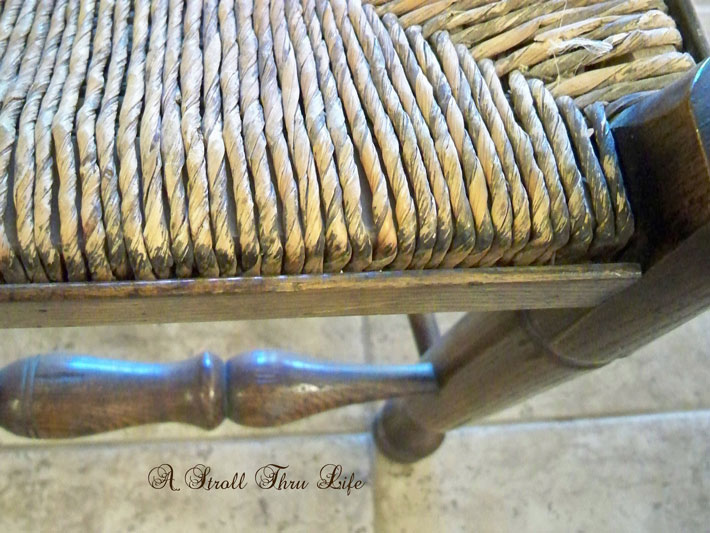
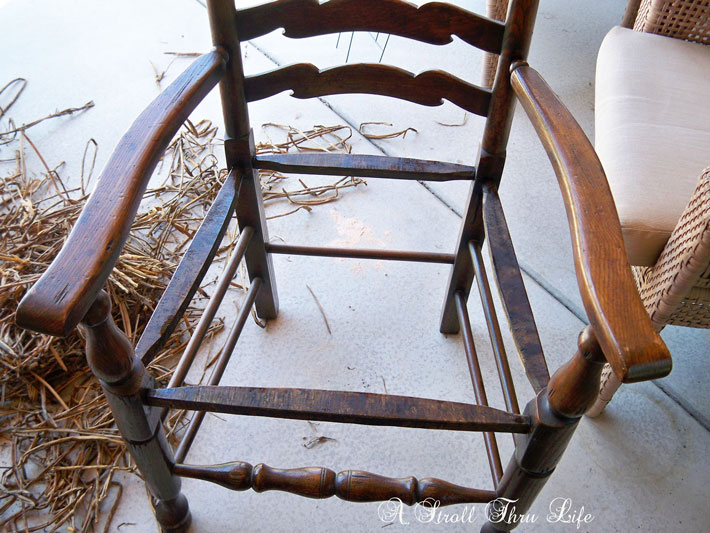
First up, I need to take all the rush off. After studying how they are made, I see that these small strips of wood around the rush are just tacked on,

With those carefully taken off, I moved the chair outside to remove all the rush.

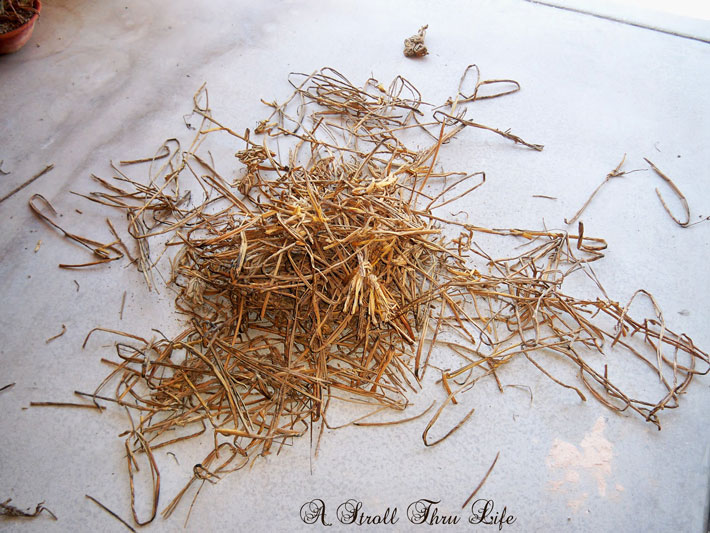
Wow, this is a mess. I have to cut part of the strips to get them to unravel.
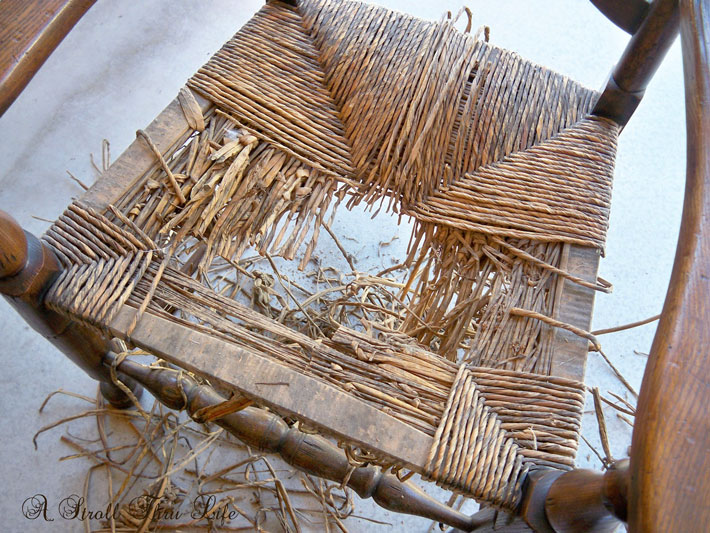

Finally, all done, I do have a big pile of rush.

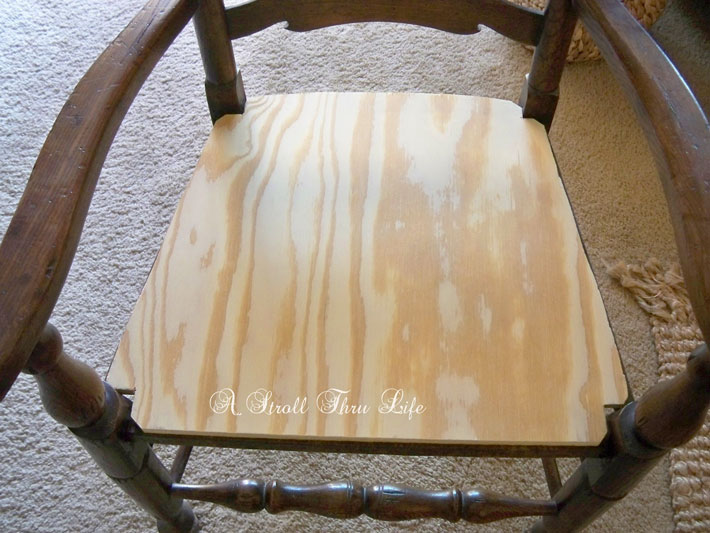
The frame boards amazed me that they weren’t stained. Now I want to be able to put a new seat on these chairs but still leave them so I can have the rush replaced if I choose to in the future.


I don’t want to staple the new seat cover to this frame, so I stained it to match the rest of the chair.

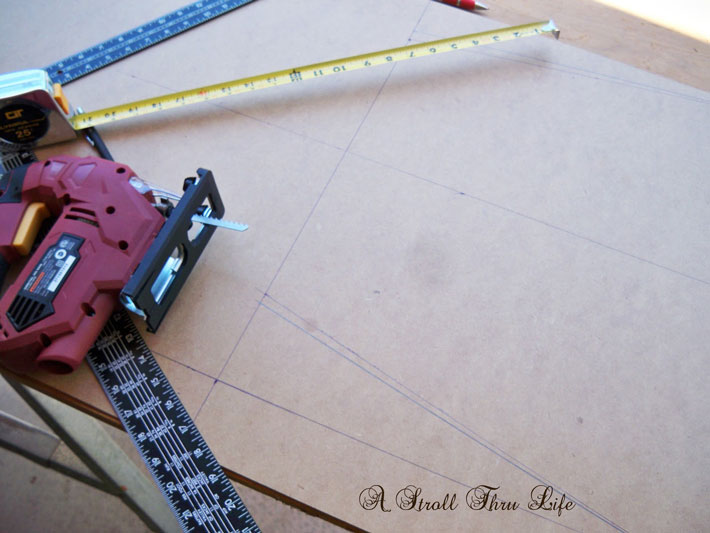
Hubby and I took a piece of fiberboard and traced off a template for the entire seat.

Once that was done we then traced it onto 1/2-inch plywood and cut it out.
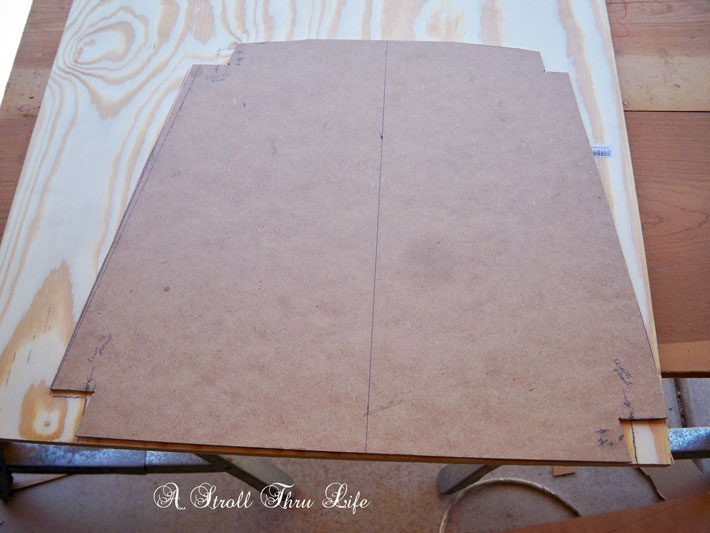

Checking to see if our seat is going to work.

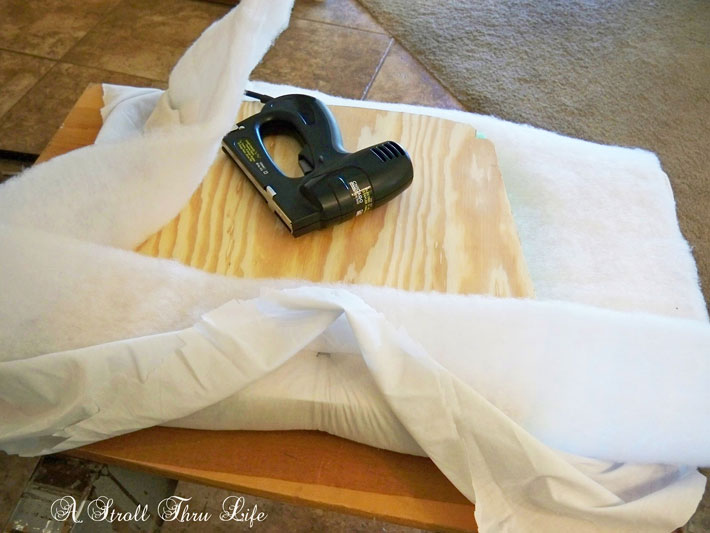
Once I had the woodcut for the seat I started the upholstery process.
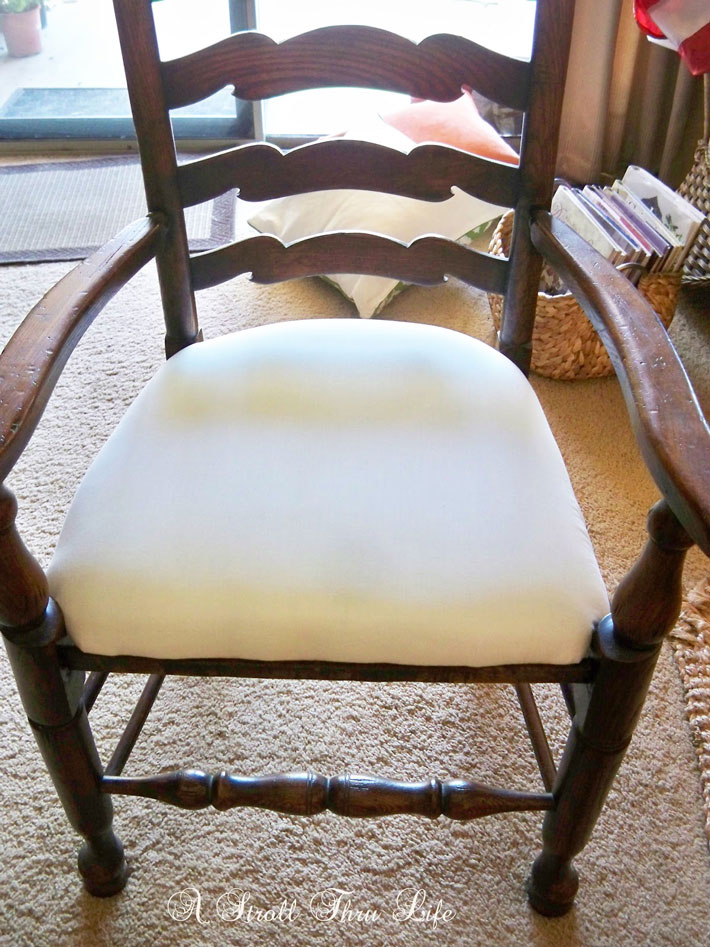
1. Next I covered the plywood with 2 inches of foam cut to the outline of the plywood, then covered the foam with batting and a piece of an old white sheet. I flipped it over and started stapling the batting and sheet to the underside of the plywood seat. To start, put the staple in the center of each side, pulling the fabric and batting tight over the foam. Then continue around each side in the same manner, making sure you do each side a little at a time, this will keep the fabric tight and smooth.
2. This is especially important as you are stapling the finished fabric. If you are using a pattern, this will make sure that the pattern stays centered on the seat cushion and you won’t have any one area pulled too tight.
3. I put one staple in on each side of my center staple and then turn and do the opposite side the same way. Then the next two sides and etc.
4. When everything is done and nice and tight, check your fabric, make sure the pattern is perfect, then do small pleats for the corners, making sure the fabric is smooth and tight and stapled well. Trim all the excess fabric and batting off, turn the cushion over and enjoy your hard work.

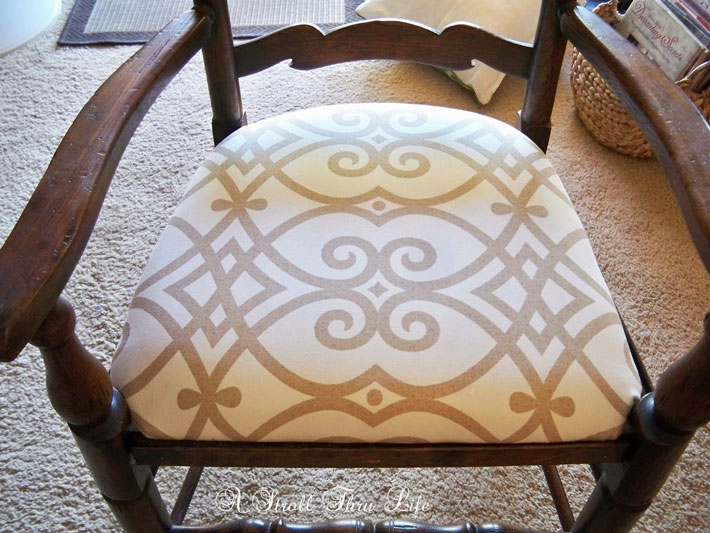
5. Looks fabulous. Now I can cover it with my designer fabric and if I want to change it in the future, all I have to do is take the designer fabric off and add a new pattern or color, I won’t have to redo the foam or batting.

6. TA-DA ALL DONE. This is the finished chair with the new fabric stapled in the same way as the sheet. Then I replaced the wood strips all around the seat. Nothing is screwed to the frame, so it can be put back to the original with the rush in the future if I choose to. The wood strips hold the seat in place so it can’t slide out.

Now I have all 6 of my chairs to use around the table.

Great save for now and the total cost was only $48. That is a win, win for sure.
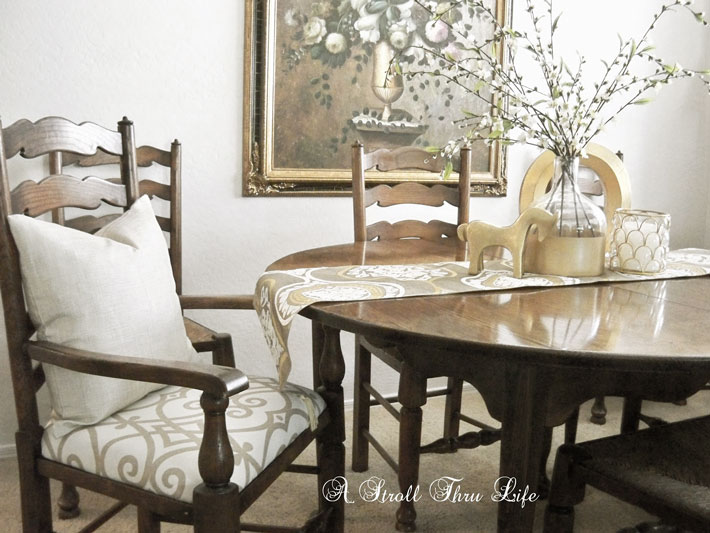

I really like having these chairs with upholstered seats, it brings more light and pattern to this end of the room.

Replacing Rush Seats – Step-by-Step Tutorial – Updated and Revised. This really is an easy fix, hope you try it if your chairs are broken too.


You might also like this chair makeover too.
My $9.99 Louis Chairs Makeover

Lovely job.